How to Coat Wood with Resin: Create Ocean Resin Art featuring @artebykristina

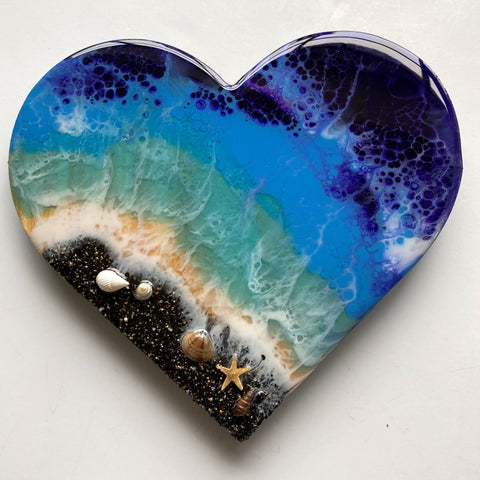
We recently asked Kristina with @ArteByKristina to teach us how to make a beachy ocean-themed art piece. We thought all of the DIY'ers out there might want to give this project a try! As you can see with Kristina's pieces, you can create this technique on any shaped board and can add sand and shells as well. Follow along as we add waves to your resin with Kristina!
Materials Needed:
- Art 'N Glow Clear Casting & Coating Epoxy Resin
- Pearl Pigments: Sky Blue, Purple and Sapphire
- Opaque White Resin Dye
- Wood Board
- Heat Gun
- Plastic Mixing Cups
- Mixing Sticks
- Gloves
- Plastic Sheeting or Silicone Mat
- Small Plastic Cups or Painter's Pyramids
Prepare Your Workspace:
When using epoxy resin, ensure your workspace is well-ventilated. You also want to pick a space that is relatively clean and has very little dust, as these particles can find their way into your resin during the curing process.
The temperature of your workspace should be mild to warm. Aim for between 72°F-85°F (closer to 78°F is ideal). Wipe down surfaces and lay down a protective covering over the table or floor. A plastic drop cloth, large garbage bag, silicone mat or cardboard are great options for protecting your work surface.
Set up your wood board on your work surface. We recommend placing your wood board on top of plastic cups so the resin can flow over the sides.
Pro Tip: Use a level to make sure your surface is level before you get started. You want to be able to control where you resin is flowing for this project.
Step 1: Measure and Mix Resin
Before you mix your resin, determine how much you will need for your project.
When you are ready to mix, measure your resin and hardener in equal parts by volume in two separate cups. Next, pour those cups into a third cup for mixing. Do not pour the mixture from high above the measuring cup as this can result in the formation of microbubbles. Mix the resin and hardener thoroughly, scraping both the sides and the bottom as you stir. Mix for 3-5 minutes, or until there is no ‘streaking’ in the resin.

Step 2: Prepare Your Resin and Pigments
Divide the mixed resin into 4 cups. Add pearl pigments to 3 of the cups and add white resin dye to the fourth cup. Mix thoroughly. You will want three different shades of blue for the ocean and the white pigmented resin will be used to create the waves.
Optional: You can add sand and shells to your piece if you would like. To do this, pour clear resin on the edge of your wood and add sand and shells until you get your desired look.
 |
 |
 |
Step 3: Apply Resin
Starting next to the sand (or edge of wood if you didn't add sand), pour a layer of the lightest shade of blue pigmented resin. Next pour a darker shade of blue resin and last, fill in the remaining space with the darkest shade of blue pigmented resin. Spread the poured resin over the surface with your mixing stick until all the wood is covered in resin. Next use a mixing stick to apply thin lines of white pigmented resin on top of the blue resin.

Step 4: Make your Waves
Use a heat gun to blow the resin to create your waves. Blow the white towards the blue pigmented resin and watch ocean waves come to life! Start with one line and once you get the look you desire, move to the next white line.

Step 5: Cover and Cure
If possible, cover your work with box for 24 hours to prevent dust from getting on your project. Let cure for 48-72 hours.
Check out these great charcuterie boards made by Kristina: