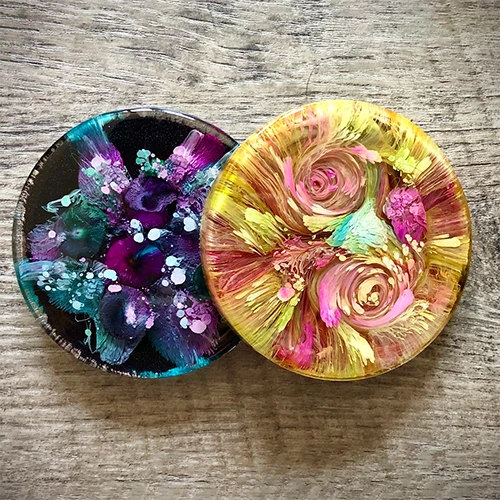
Petri Coasters - Bubble and Swirl Effects
Create original resin coasters with this fun project using Art 'N Glow Epoxy Resin! Our epoxy resin can be used to create everything from resin coated artwork and tumblers to dice, coasters and jewelry. Today, we're going to show you how to use our epoxy resin to create two different "petri effects" to create one-of-a-kind coasters!
-
Learn all about alcohol inks and resin
-
Be inspired by videos, images, and tips from people who are familiar with the ins and outs of creating resin coasters

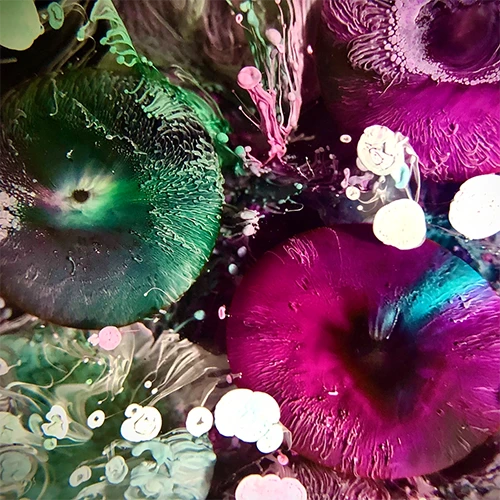
What Effects Can I Create with Alcohol Inks?
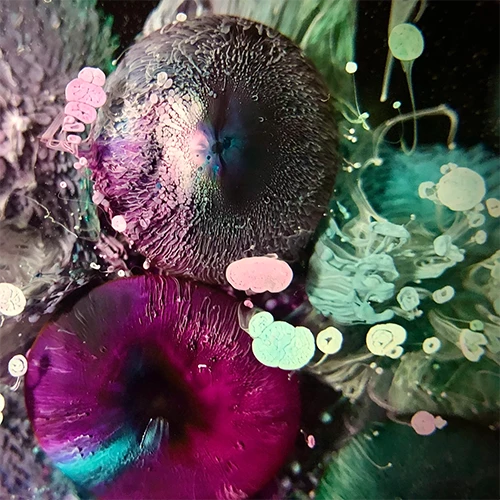
In this artistic process, epoxy resin serves as the canvas on which the alcohol ink dances and swirls. As the ink spreads and interacts with the resin, a stunning interplay of colors and forms emerges. To enhance this mesmerizing effect, artists have created many different effects causing captivating bubbles and swirls to form, creating a distinct "petri" look. This captivating technique results in striking, fluid-like patterns reminiscent of otherworldly landscapes - with each project being uniquely different every time.
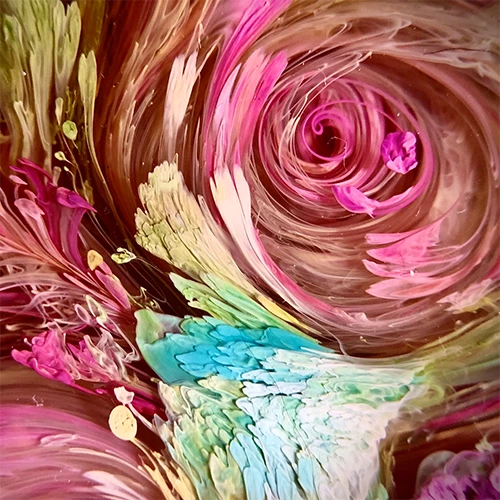
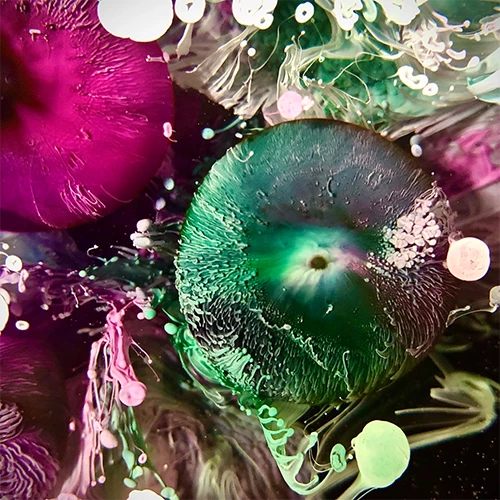

Art by: Megan Hogeman
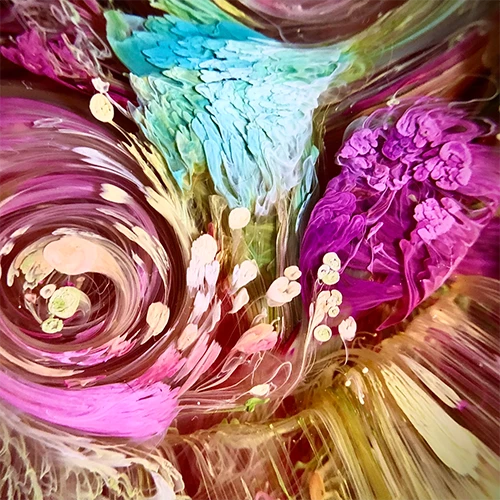
Art by: Megan Hogeman
DIY Project: How to Create Petri Resin Coasters
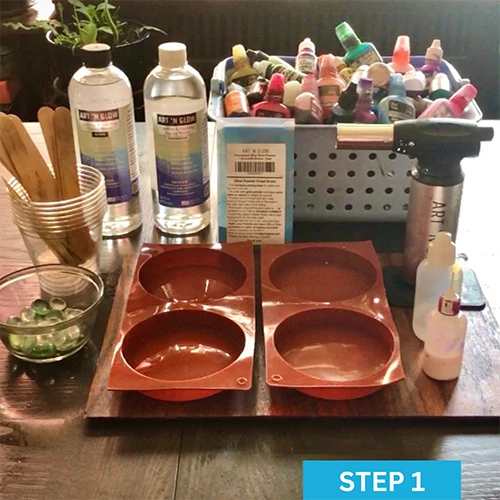
Materials to Make your Own Petri Resin Coasters
-
Circle Silicone Coaster Molds (4" circles were used for this project)
-
Alcohol Inks in your choice of colors
-
White Alcohol Ink (Jacquard Pinata Blanco was used for this project)
-
Clear Cabochons (flat sided marbles)
-
Silicone Mat or Preferred Work Surface
-
Plastic disposable cups for measuring and mixing
-
Stirring utensil (i.e. popsicle sticks)
-
Toothpicks
-
Gloves


Step-By-Step Instructions
Step 1: Prepare your workspace. Gather your resin, silicone mold, mixing cups, stir sticks & gloves.
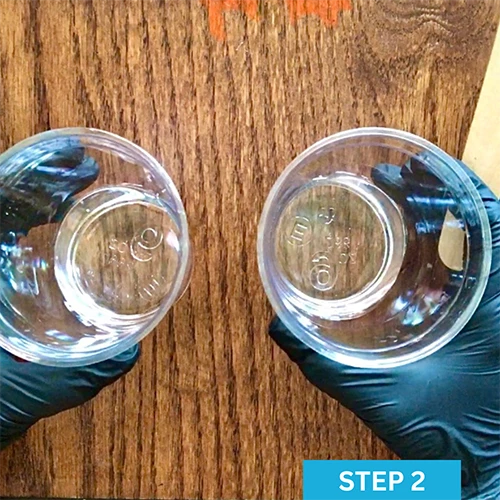
Step 2: Measure your resin and hardener. The silicone coaster molds used in this project can hold 4 fl.oz. each. You don’t want to fill them to the top so, just pour about 1.75 oz. resin/1.75 oz. hardener & combine.
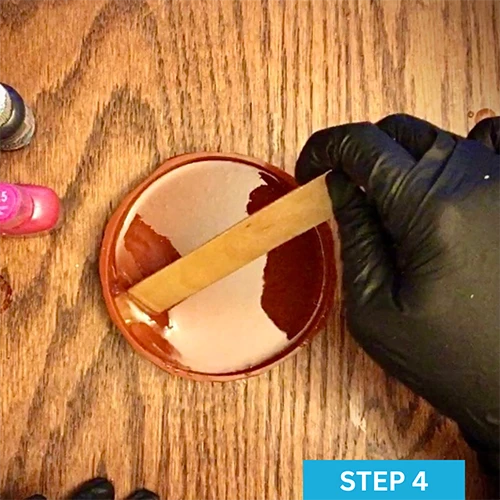
Step 3: Mix your resin & hardener for about 5 minutes, making sure to scrape the sides and the bottom edges to ensure it is fully mixed. Pour your resin mixture into your mold.
Step 4: Remove bubbles. Using your stir stick, make sure to bring any bubbles trapped in the corners up to the surface. Let your resin sit for about a minute & then sweep your torch above the surface to remove any bubbles.
Step 5: Time to add the alcohol inks! With each drop of color, you’ll want to add one drop of the white alcohol ink behind it right away. We suggest doing between one to three layers of colored ink and white. You don’t need to apply these layers in any pattern, just go wild and have fun!
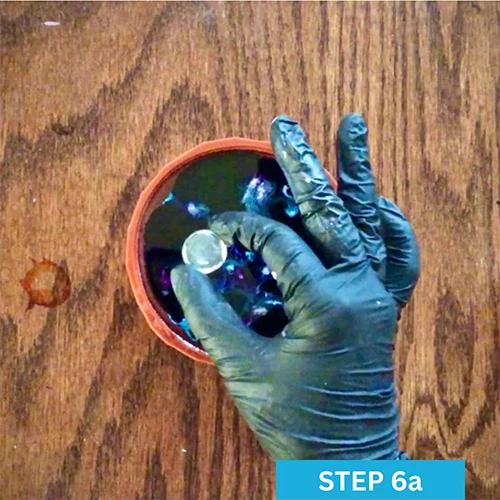
Step 6a: Option 1 -To create the “Bubble Effect,” once you are done adding all of your alcohol inks, you’ll want to just drop the cabochons into your coaster mold right on top of your work. Make sure to keep the rounded side of your cabochon facing down. Cover & let cure for 24 to 72 hours.
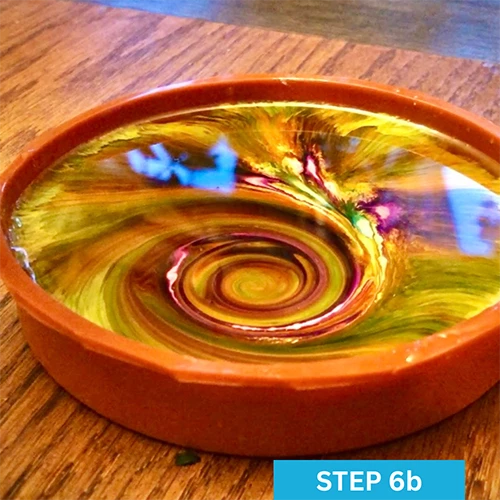
Step 6b: Option 2-To create the “Swirl Effect,” once you are done adding your alcohol inks, you’ll want to wait about 10 minutes. Using a toothpick, create the swirls of your liking. Make sure to get your toothpick almost to the very bottom of your coaster. You can go over your swirls a second time right after to make them more dramatic. Cover & let cure for 24 to 72 hours.
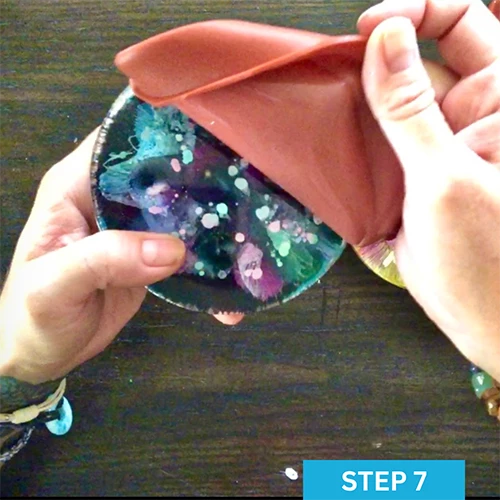
Step 7: Time for the reveal! Pop out your coasters & check out your work.
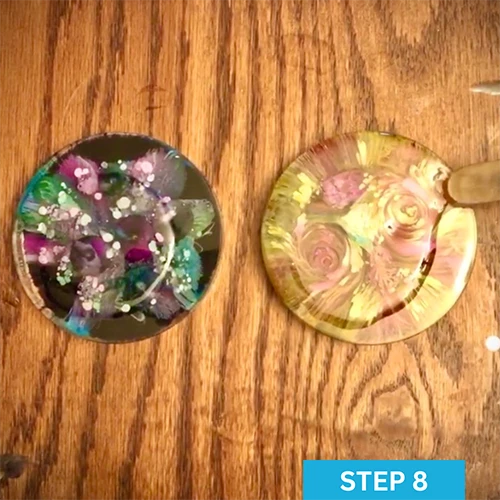
Step 8: Apply the topcoat. This doesn’t take too much resin, just about 0.5 fl. oz. per coaster. Once you’ve mixed your resin for this, pour onto the top of your coaster now that it’s right side up. Spread the resin out to the very edge using your stir stick. Use your torch in a sweeping motion to remove any bubbles. Cover & let cure for another 24 to 72 hours. Enjoy!!
Art by: Megan Hogeman
What People Are Saying
I have been using this resin for over two years now. I have tried many others, but found artnglow brand works the best for me.
- ArteByKristina
This is the best resin!!!! It's so easy to use! Nice and clear results! When mixed slowly for 5 minutes, most, if not all, bubbles will be gone! This product comes with detailed easy instructions and tips.
I have recommended this brand to many friends and members of resin groups and after using it, they are in love too!
If you're looking for a great resin! Get this!!! You won't be sorry!!!
- Kimberly N.
Casting & Coating Epoxy Resin
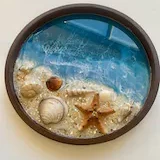
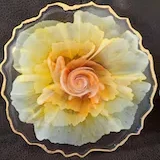
Commonly Used To Create With Resin

Glow Powder
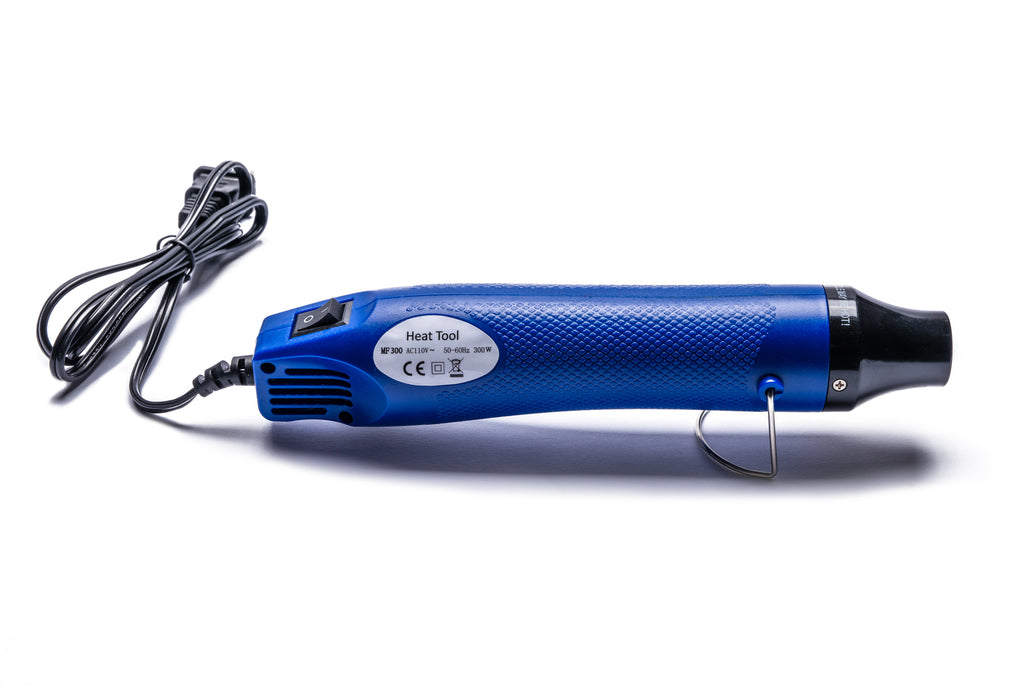
Heat Gun
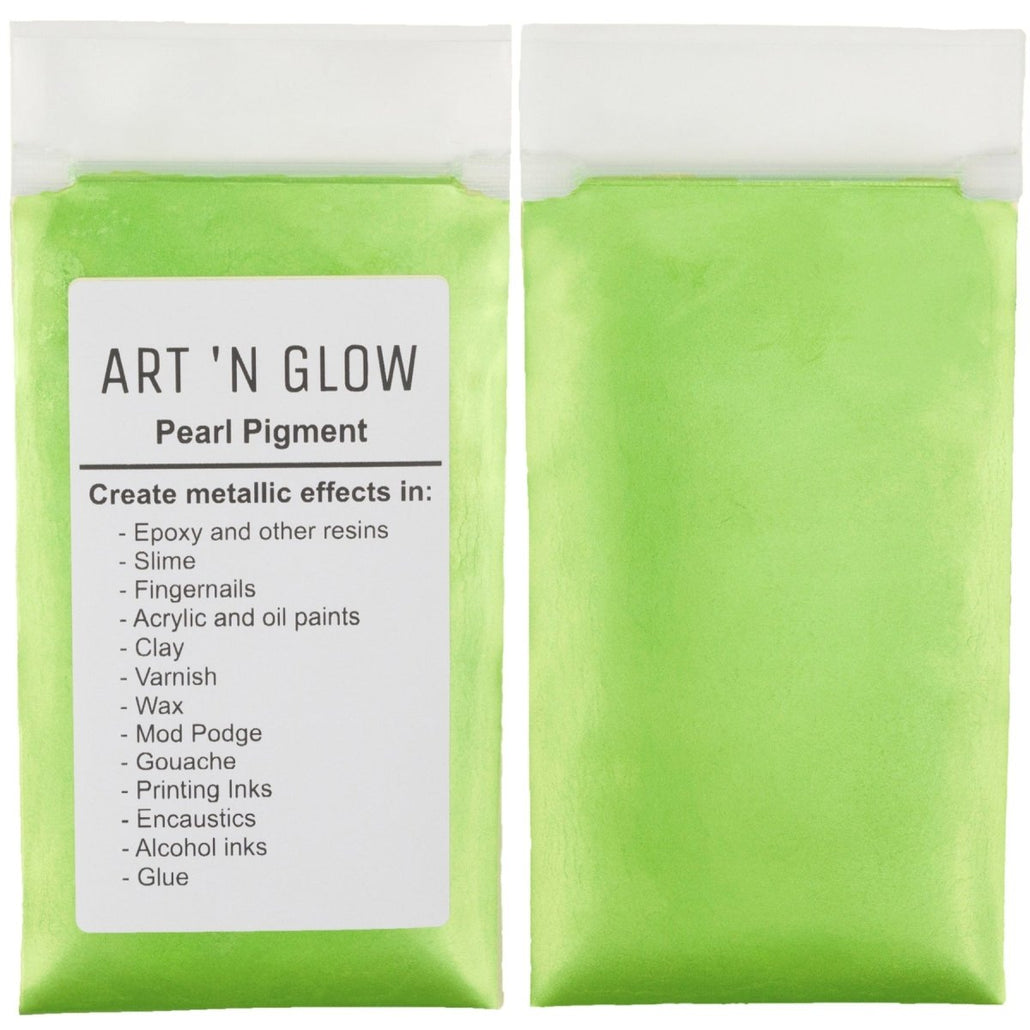
Pearl Pigments
Glow Powder
Heat Gun
Pearl Pigments
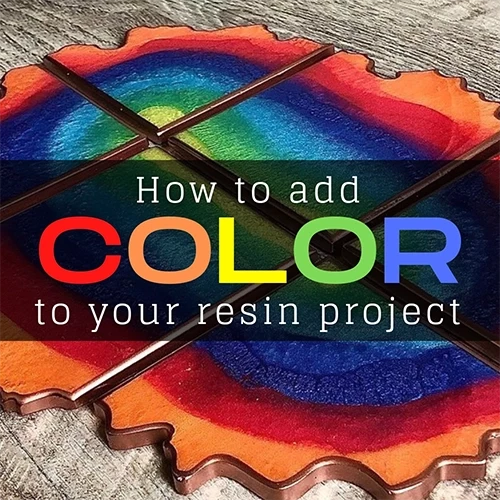
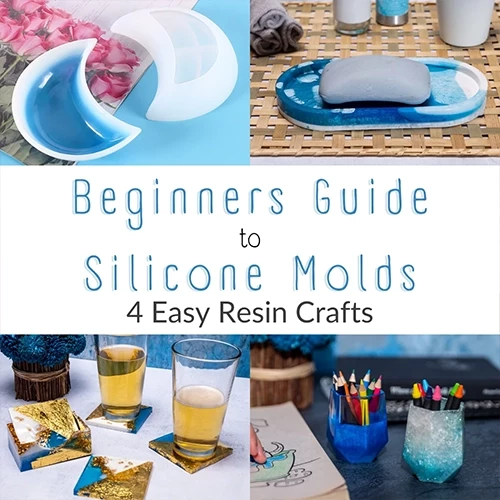
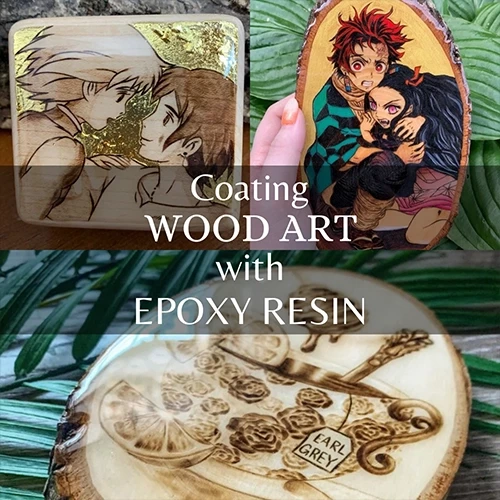
Visit Our Blog For Resin Project Inspiration


Want Free Stuff?
Join our email list to be notified of new project guides, special offers, free products and more!
Sign up now and receive a free Aqua glow powder sample!
Want to share your art with us?
Follow and tag us in your work to be featured on our pages!