Create Custom Resin River Boards
Creating a live-edge resin river serving board is a creative and visually stunning project that combines wood with epoxy resin. This unique piece can be a beautiful addition to your kitchen or a thoughtful handmade gift. Follow along with us in our step-by-step guide on how to make a resin river serving board.
Creating a live-edge resin river serving board is a creative and visually stunning project that combines wood with epoxy resin. This unique piece can be a beautiful addition to your kitchen or a thoughtful handmade gift. Follow along with us in our step-by-step guide on how to make a resin river serving board.
Resin Serving Boards
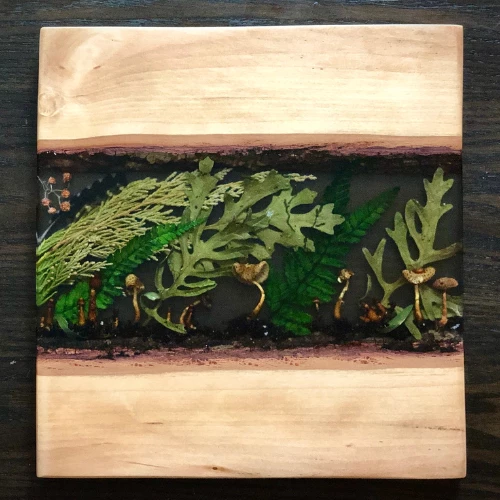
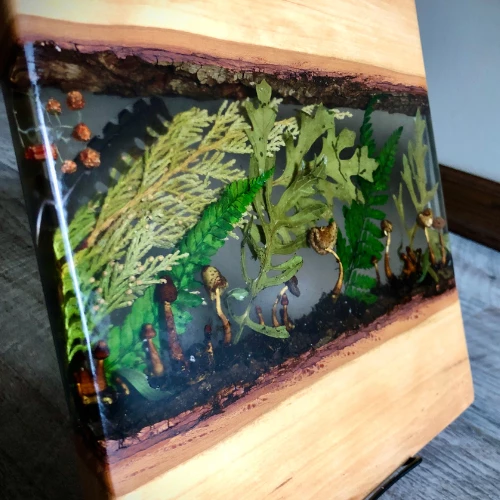
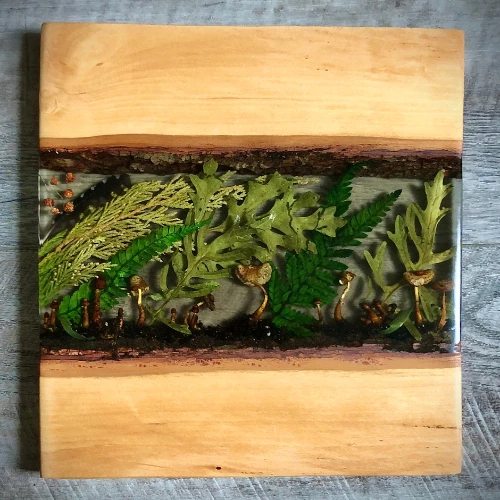
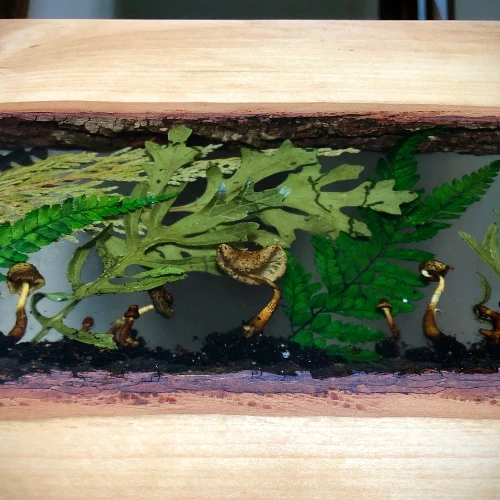
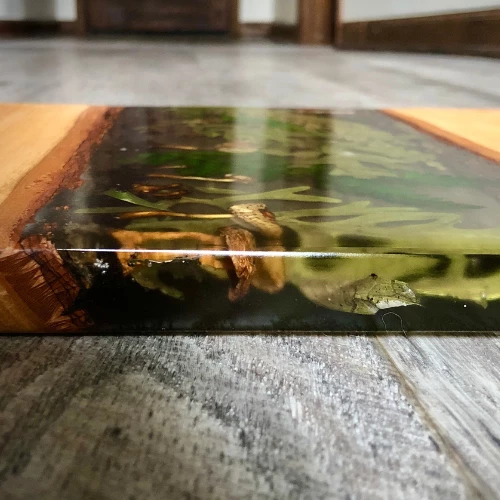
Resin river serving boards have gained popularity for their captivating appearance, combining the natural beauty of wood with the glossy, translucent allure of epoxy resin. The process involves creating a river-like channel in a wooden board and filling it with colorful or clear epoxy resin. The result is a functional and artistic piece that can serve as a charcuterie board, cheese platter, or an eye-catching centerpiece.
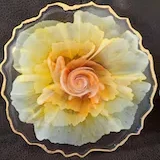
Art by: Megan Hogeman
Art by: Megan Hogeman
Let's Get Crafty
Materials to Make your Resin River Board
-
9-12" Live Edge Board (cut in half longwise)
-
Resin River Board Mold
-
Weights/Heavy small objects to place on wood
-
Embellishments of your choosing
-
Electric Sander
-
Sander paper and polishing pads
-
Tung Oil for wood finishing (we used Minwax)
-
Cutting Board Oil for epoxy (we used Walrus Oil)
-
Silicone Caulk
-
Mixing Cups
-
Stir Sticks
-
Gloves
-
Mask
Step-By-Step Instructions
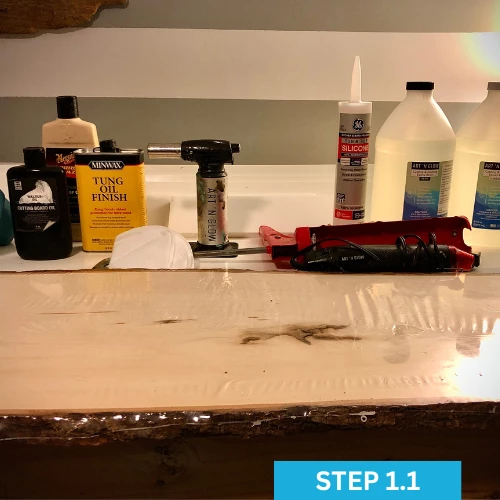
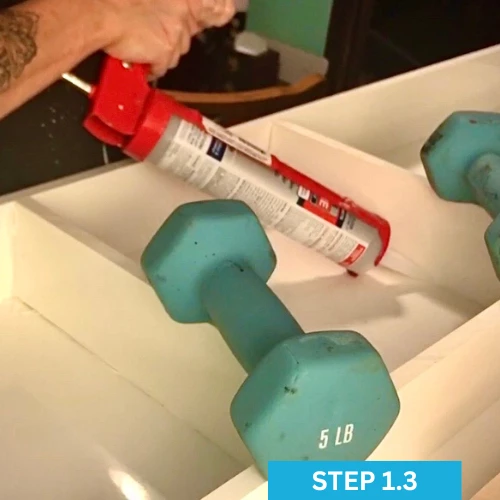
Step 1: Set up your workspace. Assemble or lay out your mold. If you’re building your own, make sure to silicone caulk all the seams (on the bottom & up the sides) to prevent leaking - big waste & huge mess! Get out your board, resin, torch, gloves and protective gear.
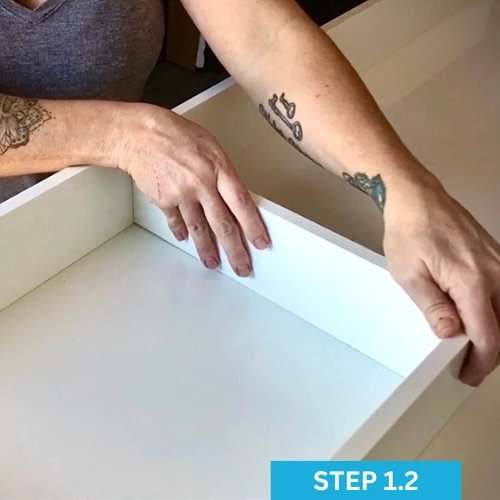
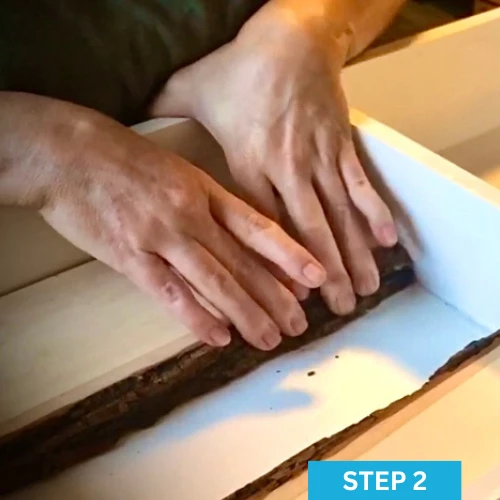
Step 2: Place the wood. Turn your 2 pieces of live edge wood that is cut in half longways and flip it so the live edge sides are on the inside. Back up the cut edges up to the sides of your mold to create space for your “river.”
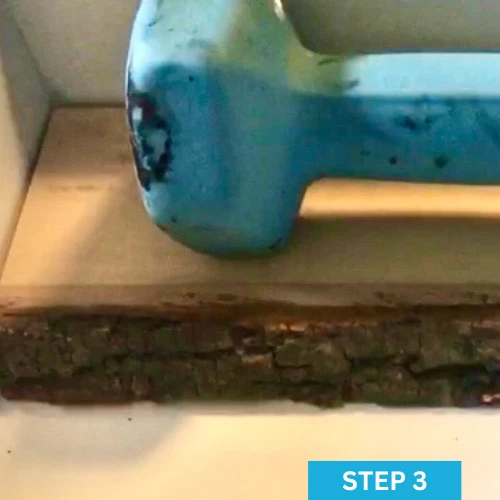
Step 3: Weigh down the wood pieces. You’ll want to do this so your board won’t float up or move around. This part is very important or else it’ll be a big waste of resin!
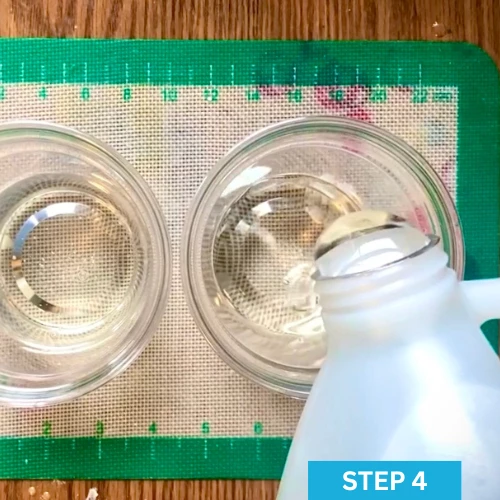
Step 4: Mix up your Art ‘N Glow Resin in a 1:1 ratio by volume, not weight. Mix thoroughly for at least 5 minutes until it is completely clear. There should be no striations left after mixing and scraping the sides of your mixing cup.
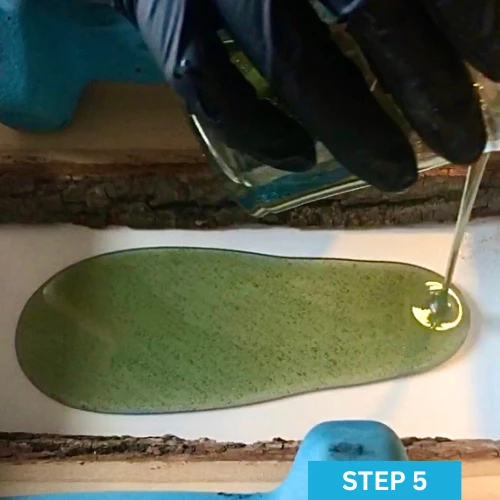
Step 5: Pour your first bottom layer of resin into the river space in between your boards basically just to fully cover the bottom to create that first layer. Wait a few minutes and sweep your torch a few inches above the resin to help eliminate any bubbles. Since wood is porous, keep an eye on it for about an hour after pouring. As bubbles appear, just torch them away before letting it cure for at least 12 hours.
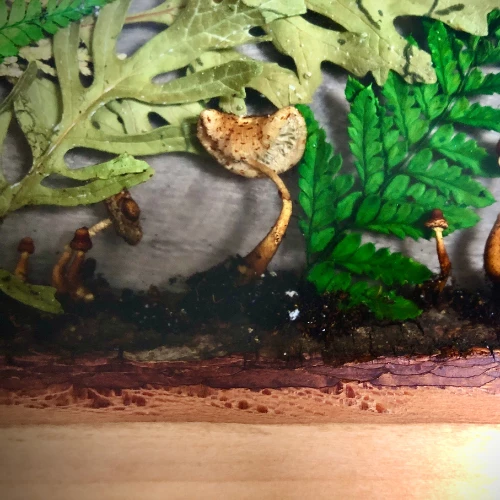
***In this step, Megan mixed in some slate grey alcohol ink to make the bottom resin layer was a little darker to make the ferns and mushrooms pop more but, that is optional. Clear would look incredible too!***
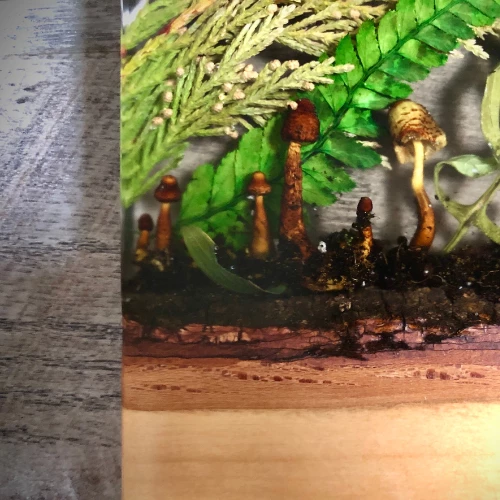
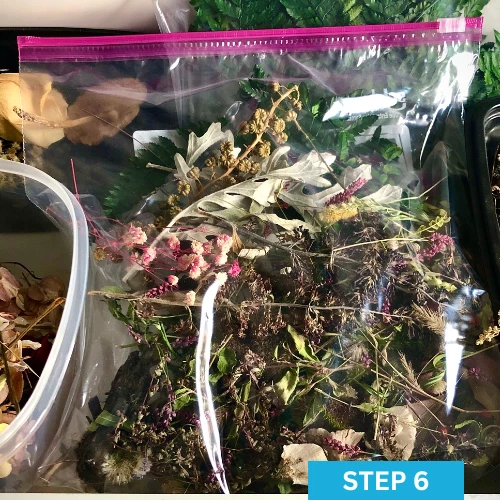
Step 6: Prep all of your river embellishments. If you have flowers, make sure they are completely dried. Any moisture is a big resin no-no and will essentially go bad in the resin after it’s cured, ruining your piece. You can also just add pigment powder! The options are endless.
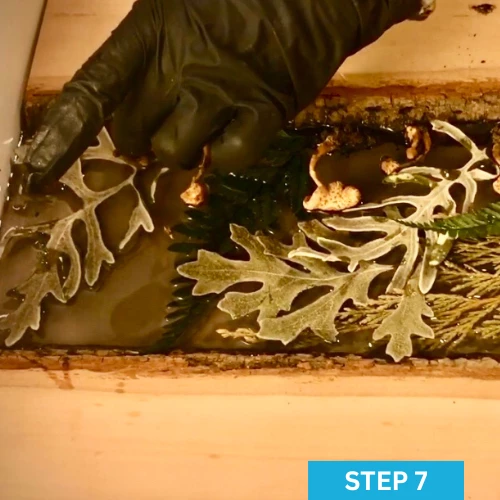
Step 7: Mix up your next layer of resin, mixing thoroughly. Once you pour in this layer, let it sit for at least 10-15 minutes. Torch out the bubbles. Once there are no more signs of bubbles, go ahead and arrange your embellishments into your river. When arranging these, make sure the embellishments are only as tall as the thickness of the board. You don’t want any sticking out above the thickness. Any embellishments sticking out of the top will end up getting sanded off in the finishing steps! Once everything is arranged, let cure for at least 12 hours.
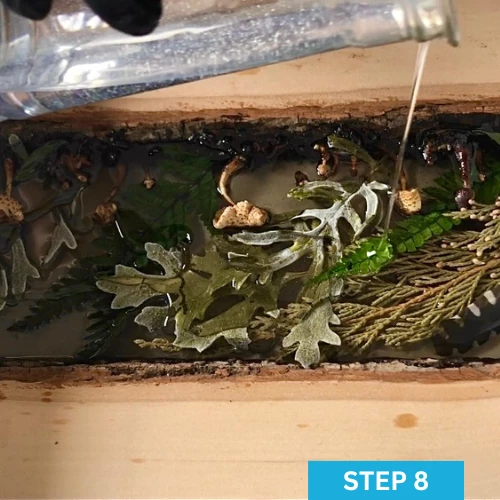
Step 8: Now that your board is starting to come together, you can take the weights off the wood parts of your board to give yourself more hand room. Mix up some more resin to begin a layer covering your river design. After mixing thoroughly slowly and carefully, start to drizzle your resin over your embellishments to cover them all and start to build up that next layer of resin to cure everything into place. Keep making sure that any of your river trimmings are tucked in and not poking out - you want to keep those under the level of the board.
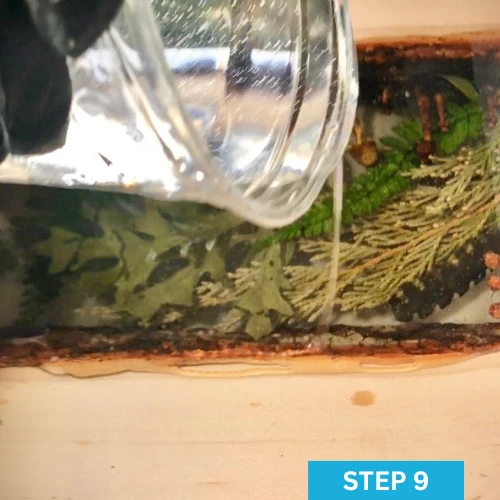
Step 9: Keep making your thin layers until you get to the final layer. This final layer needs to be monitored pretty heavily. After pouring it to the top of the thickness of the board, you will get bubbles from the wood so, make sure to pour at a time where you can keep checking on it. After this final layer, let it cure for at least 24 hours!
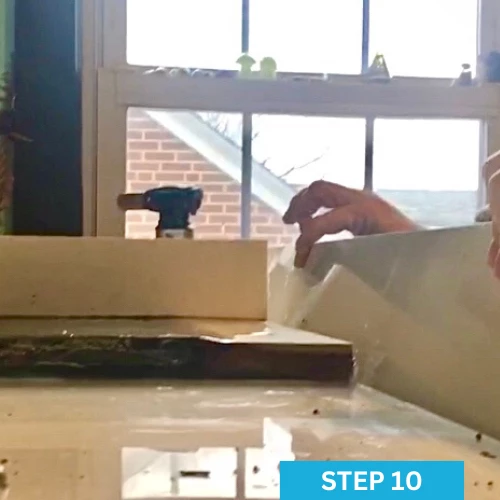
Step 10: Now you can demold your almost finished masterpiece! A silicone mold will be easy to demold. With a built mold, you’ll need to pry the sides off very carefully and peel off the silicone from the seams.
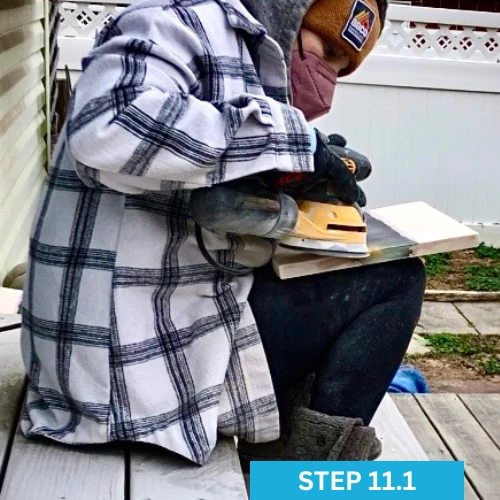
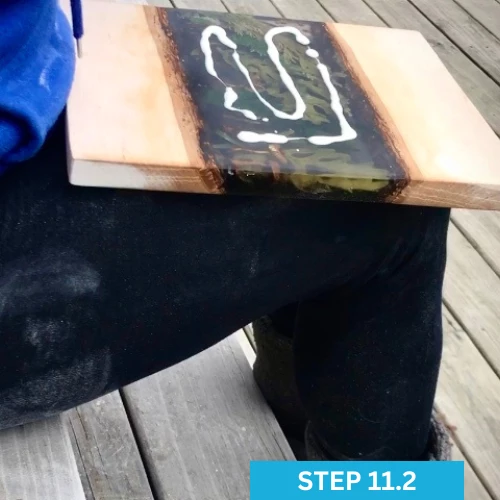
Step 11: Clean it up! Trim the sides with a saw or you can sand it down if it’s not too bad. Carefully sand the sides, top and bottom. Start with a grit around 300 and move your way up slowly from grit to grit until you get to the buffing and polishing grit.
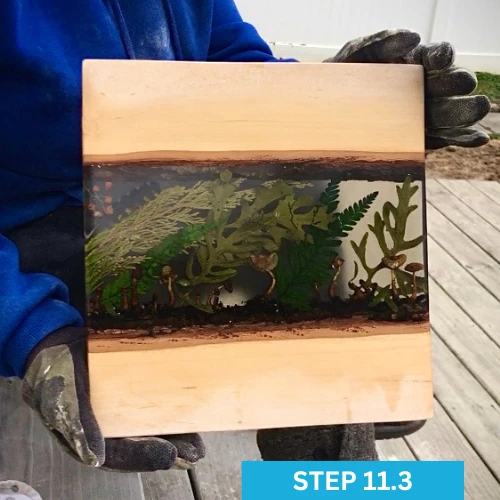
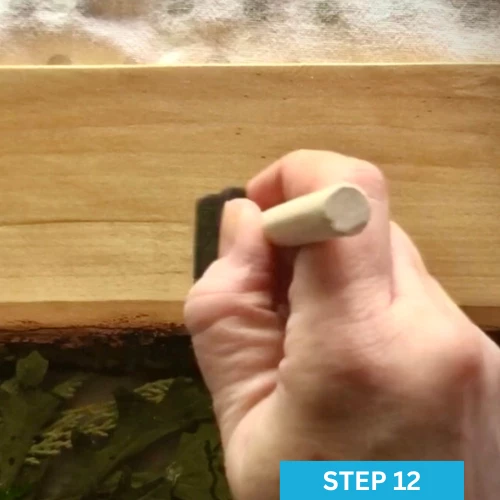
Step 12: Finishing touch! Once it is nice and even and polished…..finish it off with some Tung Oil on the wood in a well-ventilated area. This oil is great because it brings out the grain of the wood AND it penetrates to last a long time to highlight the beautiful resin river you’ve created!
Art by: Megan Hogeman
What People Are Saying
I have been using this resin for over two years now. I have tried many others, but found artnglow brand works the best for me.
- ArteByKristina
This is the best resin!!!! It's so easy to use! Nice and clear results! When mixed slowly for 5 minutes, most, if not all, bubbles will be gone! This product comes with detailed easy instructions and tips.
I have recommended this brand to many friends and members of resin groups and after using it, they are in love too!
If you're looking for a great resin! Get this!!! You won't be sorry!!!
- Kimberly N.
Commonly Used To Create With Resin

Glow Powder
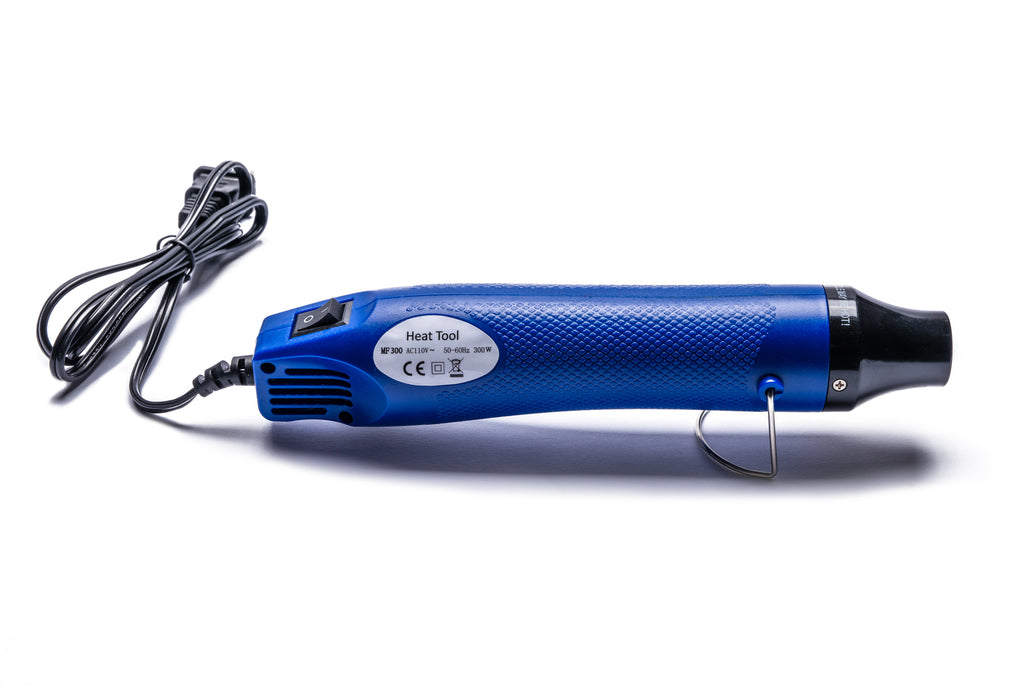
Heat Gun
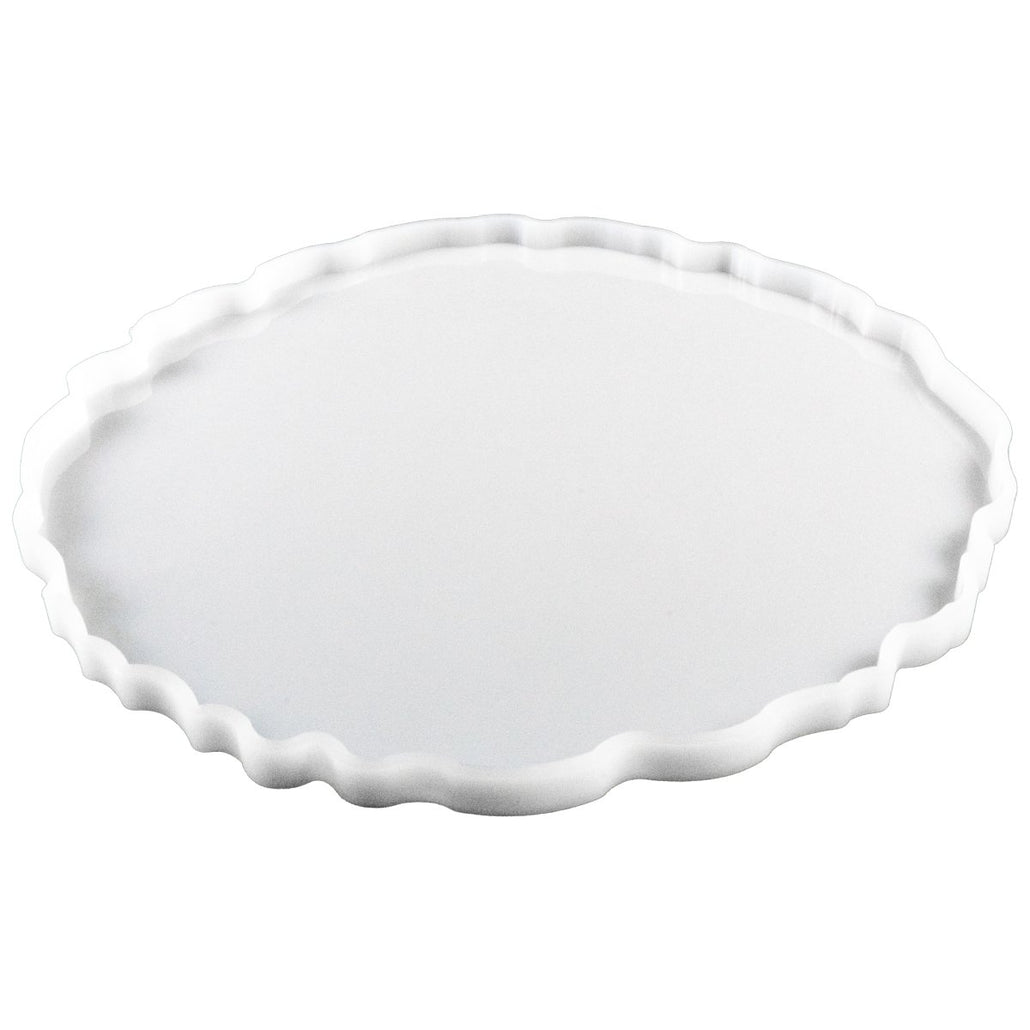
Silicone Molds
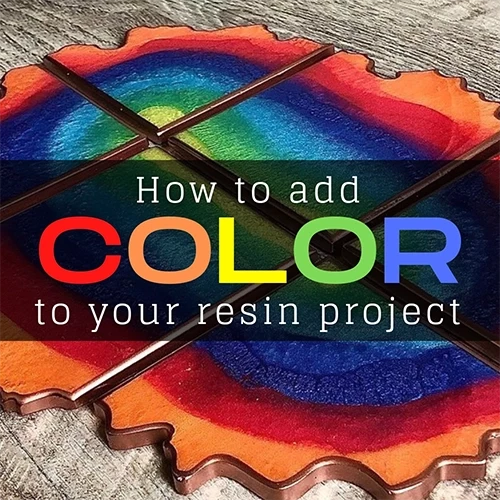
Visit Our Blog For Resin Project Inspiration


Want Free Stuff?
Join our email list to be notified of new project guides, special offers, free products and more!
Sign up now and receive a free Aqua glow powder sample!
Want to share your art with us?
Follow and tag us in your work to be featured on our pages!